 Pool equipment
 Liner and reinforced PVC, sealing material and pool paint
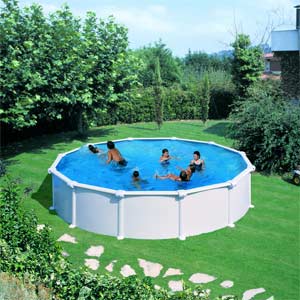
  Replacement liner for above ground pools
 Replacement liner for above ground pools
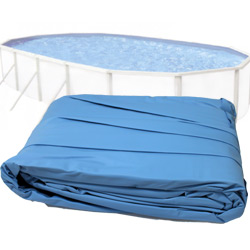
Recommended retail price 2025 starting from :
200 €
Our Price starting from :
169 € Including VAT
Ref. Abatik 010208
Ref. Provider L11248/52
Round liner for above ground pool diameter 3.50cm x1.32- blue single colour
Ref. Provider L11248/52
Round liner for above ground pool diameter 3.50cm x1.32- blue single colour
Discover our range and promotions of replacement liners for above ground pools - round, oval, octagonal, many promotions available to replace your liner at discount price.
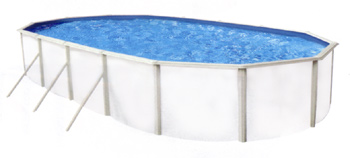
Oval liner for above ground pool 5.50m x 3.70m x 1m32 printed colour
Ref. Abatik 020418
Ref. Provider 3BPZ0118
Ref. Abatik 020418
Ref. Provider 3BPZ0118
129 €
Round liner for above ground pool, diameter 4.60m, single colour
Ref. Abatik 010209
Ref. Provider L1154825
Ref. Abatik 010209
Ref. Provider L1154825
150 €
Round liner for above ground pool diameter 6.40m single colour
Ref. Abatik 015581
Ref. Provider 3BPZ0120
Ref. Abatik 015581
Ref. Provider 3BPZ0120
169 €
235 €
Round liner for above ground pools 3.60m in diameter, single colour
Ref. Abatik 010208
Ref. Provider L11248/52
Ref. Abatik 010208
Ref. Provider L11248/52
169 €
Oval liner for above ground pool 9.20m x 4.60m x 1m32 printed colour
Ref. Abatik 020416
Ref. Provider 3BPZ0121
Ref. Abatik 020416
Ref. Provider 3BPZ0121
359 €
Round pool liner, diameter 5.50m, depth 1.32m printed colour
Ref. Abatik 010210
Ref. Provider 3BPZ0117
Ref. Abatik 010210
Ref. Provider 3BPZ0117
259 €
Discover the range of Astral liners for above ground pools to replace your old liner!
A liner creates a watertight pocket that pushes against the pool floor and walls of your pool, made from PVC. With time, a liner can deteriorate or tear. Swimming Pool Online offers you the solution to replace your damaged liner.
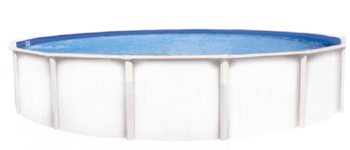
1. Spread a layer of sand over the pool floor. Use a rake to even and compress the sand.
You could choose to use an underfelt rather than sand. If so, cut the widths and joint with adhesive tape on the whole length.
If you choose to use sand, form an 8cm width and depth around the total parameter of the pool floor.
Installation of liner
Place the package in the centre of the pool floor.
Open the package. Do not use sharp objects to open the packaging.
Spread the liner in the sun to soften. Check there are no surface or joint defaults.
Place the liner in the pool making sure it's upper side is facing upwards. The circular joint should be positioned centrally, on the periphery of the pool. The remaining joints will create straight lines crossing the pool floor.
Smooth all folds on the pool floor.
Bring the edge of the liner to the pool border and hold in place provisionally with a tightening clamp. Let the liner hang and do not pull.
Begin to fill your pool.
While your pool begins to fill, smooth all folds, beginning with the centre point of the pool, making circular movements towards the pool walls.
You can use a soft brush, never applying pressure and without pulling.
Proceed quickly, as only a few centimetres of water can push the liner against the pool floor making repositioning difficult without damaging the liner.
Always check that the oval joint remains positioned centrally, on the lower periphery of the pool wall.
After smoothing the pool floor area, continue to fill the pool with water and smooth the liner against the pool walls. Be careful that the liner is not under tension and that air bubbles do not form.
After having smoothed the liner around the pool walls, maintain the edges in place using the clamping board. Continue the process around the whole pool circumference. Once all folds have been smoothed, cut the sections of the liner which go beyond the tightening board so that its edge pushes tightly against the next board.
Now position the plastic border on the clamping board and proceed on the whole pool circumference.
Remark: A slight "wave" on the liner during its installation is natural. This is caused by the vinyl coating that protects the liner during manufacture.
Remark: A liner is not a construction element of a pool. Its role is to create a watertight pocket. Water pressure maintains its position against pool walls and the construction elements of your pool. The liner must adhere correctly to the pool floor, edges of pool and pool walls. Your pool must never contain a volume of water too heavy for the structure to avoid damage.
A liner creates a watertight pocket that pushes against the pool floor and walls of your pool, made from PVC. With time, a liner can deteriorate or tear. Swimming Pool Online offers you the solution to replace your damaged liner.


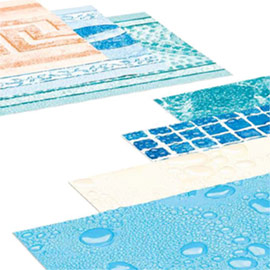
Available colour depending on model

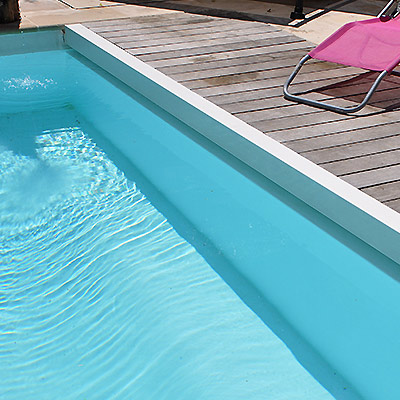
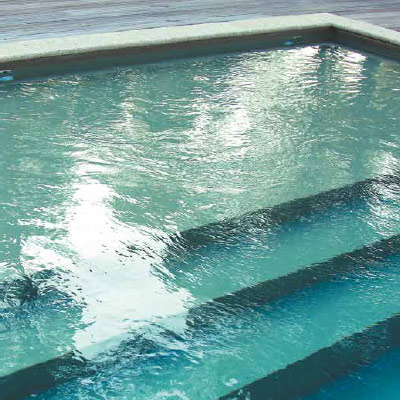
Single colour, blue

Blue print

Single colour, blue

Blue print
How to fit an above ground pool liner
PREPARE THE POOL FLOOR
1. Spread a layer of sand over the pool floor. Use a rake to even and compress the sand.
You could choose to use an underfelt rather than sand. If so, cut the widths and joint with adhesive tape on the whole length.
If you choose to use sand, form an 8cm width and depth around the total parameter of the pool floor.
Installation of liner
Place the package in the centre of the pool floor.
Open the package. Do not use sharp objects to open the packaging.
Spread the liner in the sun to soften. Check there are no surface or joint defaults.
Place the liner in the pool making sure it's upper side is facing upwards. The circular joint should be positioned centrally, on the periphery of the pool. The remaining joints will create straight lines crossing the pool floor.
Smooth all folds on the pool floor.
FIX THE LINER TO THE POOL WALLS
Bring the edge of the liner to the pool border and hold in place provisionally with a tightening clamp. Let the liner hang and do not pull.
Begin to fill your pool.
While your pool begins to fill, smooth all folds, beginning with the centre point of the pool, making circular movements towards the pool walls.
You can use a soft brush, never applying pressure and without pulling.
Proceed quickly, as only a few centimetres of water can push the liner against the pool floor making repositioning difficult without damaging the liner.
Always check that the oval joint remains positioned centrally, on the lower periphery of the pool wall.
After smoothing the pool floor area, continue to fill the pool with water and smooth the liner against the pool walls. Be careful that the liner is not under tension and that air bubbles do not form.
After having smoothed the liner around the pool walls, maintain the edges in place using the clamping board. Continue the process around the whole pool circumference. Once all folds have been smoothed, cut the sections of the liner which go beyond the tightening board so that its edge pushes tightly against the next board.
Now position the plastic border on the clamping board and proceed on the whole pool circumference.
Remark: A slight "wave" on the liner during its installation is natural. This is caused by the vinyl coating that protects the liner during manufacture.
Remark: A liner is not a construction element of a pool. Its role is to create a watertight pocket. Water pressure maintains its position against pool walls and the construction elements of your pool. The liner must adhere correctly to the pool floor, edges of pool and pool walls. Your pool must never contain a volume of water too heavy for the structure to avoid damage.
Warranty
2 years
Photos non-contractual
Price incl. VAT
Price incl. VAT
Ask for a free quote replacement liner for above ground pools
Other product : Replacement liner for above ground pools
Starting from 169 eur Including VAT.
Please fill in this form carefully. Our commercial service will handle your request promptly.
UK freephone hotline
Monday Friday 9.00 18.00

Spare parts order
You are looking for a spare part for «Replacement liner for above ground pools » ?
Please click the button below. Our commercial service will handle your request promptly.


